Sunday, November 14, 2010

* Stuffed Bell Pepper

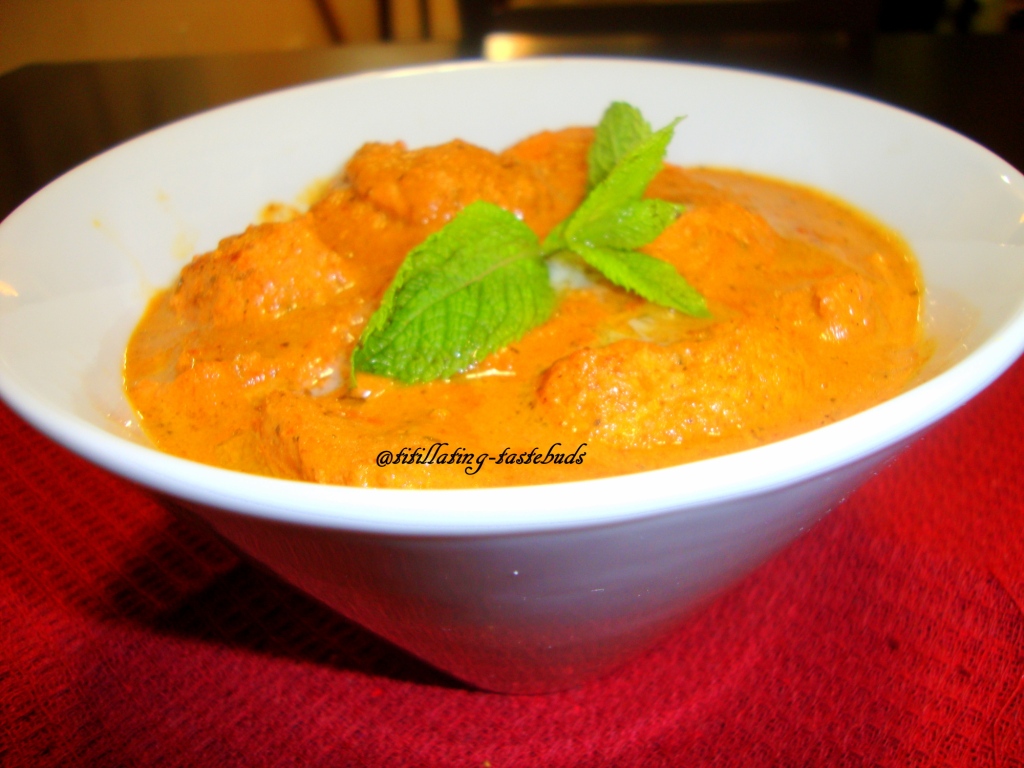
These  stuffed bell peppers were one of my long awaited  dish.And one fine  day in my experimental spree, I opened my refrigerator  and gathered my  favorite  ingredients and  wanted to  make  the  stuffed bell peppers before these petite  bell peppers are  either  spoiled or  consumed  in any  other form(I always  have  10  different  ways  to  eat  bell pepper,love them).   Of course  I searched in Internet and   as  expected  I didn't find all the  ingredients at home the recipes  called for , then  decided just  listen to my  instinct  and  voila the resulting dish  won Shaan's heart. We  enjoyed these beauties , they were   wholesome dish. The stuffing are  upto the individual  taste .
here is  what  I used :

Ingredients :
  1. Red or Orange or Yellow Bell peppers - 4(Smaller  ones  are good  for this dish)
  2. Cumin Seeds                                        - 1/2  tsp
  3. Onion(finely chopped)                          -  2 tb sp
  4. Zucchini(Shredded)                              -  1/2 cup
  5. Mozzarella Cheese(Shredded)              - 1/2 cup
  6. Sweet corn                                           - 1 cup
  7. Cooked Rice                                        - 1/2 cup
  8. Garlic(Finely chopped)                         - 2 tb  sp
  9. Portobello mushrooms(Chopped)          - 1  cup
  10. Tomatoes(Chopped)                          - 3 tb sp
  11. Green Onion(Chopped)                         - 3 tb sp
  12. Garam masala                                       - 1/2 tsp
  13. Salt                                                       - to taste
Procedure :

 1. Wash  and pat dry the  bell peppers.Chop a  thin  section of  the bell peppers so that they  sit comfortably
      while  baking.
 2. Cut the tops off the peppers and remove all the seeds from inside and  toss them on the pan  with a  tea
     spoon of  vegetable oil for  3-4  minutes and  keep them in aside  in the baking dish.

3.  Next  step is to prepare the  stuffing. The Stuffing  has  as may options  as you can think  of, you can do 
     with  meat or  vegetables.Here  I tried  with all the veggies.
4. Start with a  a table  spoon  of  vegetable  oil in a  pan, splutter cumin seeds then  add chopped onions. 
    Once Onions are  soft add Shredded Zucchini.Cook it  for  a minute then  add the chopped tomatoes and 
    Mushrooms.
5. Cook them for  5 minutes add garlic, then  add the shredded mozzarella,sweet corn and  cooked rice.
    Mix  in  and cook for  another 2 minutes. then  add  the garam masala  and  chopped  green onions to the
   mixture and  the stuffing is ready.
6. Now  stuff the  bell peppers, after the peppers are full, put the tops back on.
7. Cover the entire baking dish with aluminum foil and throw the dish into the over for 30 minutes in to 
   350F Preheated oven  .
8. Remove the foil and cook for an additional 10 minutes.
                             Make sure the peppers are tender, but not falling apart.

Thanks  for  visiting and  I would  love to hear  from you  if you liked your  stay here.
Happy cooking and  cheers. 

Tuesday, November 2, 2010

* Tipsy Pudding......Truly Mouth watering desert


     'Tipsy Pudding' the  name  sounds really  catchy....when I heard in the  laptop where Shaan (My  husband) is hooked up to all possible news websites. One weekend  he was going through his stuff of world news  and  he stopped by in  one channel where  a show  named 'secret  kitchen- hosted by Bikramjit Ray' comes.This one  is my favorite,,its like my dream job...he  goes  places and  gets to  eat all  specialties and gets the secret recipes too.So this  was  on the  occasion of  Indian Independence day when he  goes to the most prestigious place of  Indian defense system,where they  train  the cadets(the future officers),,he goes to National Defense academy(NDA) and  gets  three very special  recipes from the  chief  who is there for  last 35 years  and  has served some very important people in  the world. I have been there couple of times during  R's  study time (he  is one of the tuff guys trained out  there,he is  my mom's  best friend's son )and I was his  local guardian (LOL,, I'm just  two years  older to him),I don't mind it as  long  as it let me visit this  very well maintained beautiful place.Seeing his Graduation ceremony was a very special occasion, You feel for the nation all the more if you  see the spirit  of these  young charged blood. My dad also works for  Defense, so it was even emotional   to  watch the  show. Now coming to the food  part :-) The  chef of  NDA  spills his secret recipe of tipsy pudding which is served  at NDA on special occasions for special  guests. The moment I saw it,my mouth started watering and I had to try out as soon as  I saw.I  had everything but the Whipping cream, So I  got it  and made when My daring friends(I  said "Daring"  coz, they are brave enough to try  my  experiments time to time) came  over  for a  weekend chit chat. The  9X9 desert vanished  within minutes.it was  indeed a scrumptious desert.It is  simple  and a great make ahead desert.
I have  made  it couple of times  after that and incorporated small little modification  from  the original  recipe that I saw,The lemon zest added to the top whipping cream layer really makes it an exotic dessert.
Give it a try if you  are a dessert person, I know  people  who are  not  very fond of dessert part still  go crazy  for this one.

Serves :8 - 10 people

The show  didn't  tell the proportions , so I had to come up with my  proportions which worked  well for  a 9X9 baking  dish or you  can  have  individual  portions  in  small desert blows for nice  individual deserts.

Ingredients:

1. Plain Pound cake(Chopped to small cubes) : 2 cups(You  can  bake a  ready cake mix in a  cookie sheet 
                                                                        and once they are cool  cube them or  buy  any pound cake 
                                                                        and can cube them)
2. Fresh Seasonal fruits                                   :  2 cups- Chop to very small cubes (Any fruit will do,I have  
                                                                          used 1 Pears,1  golden  kiwi and hand full of  blueberries)
3. Dry fruits                                                    :  1 cup- chopped-I used  Almonds,Cashews,raisins and 
                                                                          apricots.
4. Whipping Cream                                        :  300 ml
5. Sugar                                                         :  5 tb sp
6. Custard powder                                          : 3 tb sp ( I used Brown & Polson Custard Powder   
                                                                        Vanilla  Alternatively  you can use  vanilla  pudding mix )
7. Milk                                                            : 1 cup
8. Pure Vanilla  essence                                   : 1/2 tsp
9. Lemon and orange  Zest                              :  1  tb sp

Procedure:
1.

   First prepare the  custard before you  start to assemble rest of the ingredients for the pudding.This
   custard is not the traditional custard  that is made from  egg and milk mixture
   For  preparing the custard, mix  the  custard powder in 4  tb sp of  milk and add this mixture slowly to the
   boiling milk and  stir for  5 minutes(if you  want you  can add 2 tb sp  of  sugar).it will get thick
   consistency.Take it out of  heat and  let it cool  down and  bring it to  room temperature.
2.

  Beat the whipping cream and 3 tb sp Sugar  until stiff  pick forms ,keep it aside.While beating the
  Whipping  cream be careful  about not to over beat it,because if you  over beat the  butter starts to separate
  which  spoils   the purpose of  whipping cream in the dish.Divide the  whipping cream in two  parts,one 
  part  for  mixing  the  fruit mixture and  second  part  for  the  top layer.
3.

  In a  bowl, Mix cubed pound  cake,Fresh Fruits,dry fruits.pour in the cooled  down  custard. then  mix in
  one part of  whipping cream.Add the vanilla extract to the mixture and mix well.Now the  base  of the desert  is ready.Now  pour  this mix to your serving dish and spread evenly.Here you can use large dishes to make a big pudding or make small individual portions.

4. For top layer  ,add  lemon and  orange zest  to  the whipping cream  and just fold  in,then spread the 
   whipping cream evenly  and  keep in refrigerator  for at least 1 hour. Once  chilled to  your preference
   you  can  directly serve  or  decorate with some  chopped  dry fruits or  fresh seasonal fruits.

Enjoy and  happy  cooking...  :)


Saturday, September 25, 2010

* My Mom's Vanilla Chiffon cake

          This is an  amazing cake that my school n college friends  can vouch for.I call it  Vanilla Chiffon Cake for its texture. Baking this  cake  and  eating  ,,takes  me  back to my University days.When I used to go back to hostel after  vacation,,all my friends  invariably knew that I  will have a  box of cake in my  side pocket of my bag and before I enter my room the cake box will be  already open, sometime they  try to  be formal and wait  until I open the box.I wanted  everybody get a bite,,sometimes the box  gets  over  before  everyone  come to my room  for  a  bite.So later I used to  hide  some  for those who didn't  show up first and  some for the evening chit chat in  my room with friends,S,R and M,miss you guys.Same was the case  in my  younger brother's hostel :) so this  was  the favorite of  all the  friends.I gave this cake couple of tries,,but  my husband always says its  not  like  Mom's  cake.So I  kept trying and  now  I got it right after I jotted  down step by  step process from my Mom when I talked to her  over our long weekend chats.It is a simple recipe,but I don't know what went wrong every time  I gave it a try .Whenever I made in last couple of years  she was always  around,so I never  went wrong so I was  very confident, but  I always messed  up in all  my attempts.Couple of months back I made this  cake for  our anniversary and we  both loved it.When I was searching  a box to keep the left over,,he said,,,don't bother about the box now,,you will  need a box if something will be left  at all..And  he was right.we finished the whole cake in a day :)
So  now  comes the recipe.This will make   one  bunt cake ring.

Ingredients:
1. Eggs - 4
2. All purpose Flour         -  1.5 cups
3. Granulated white Sugar - 3/4 cup
4. Vegetable Oil                -  1/2 Cup
5. Vanilla Extract               - 1  tb sp(Use the original  vanilla extract for a  better  flavour)
6.  Honey                          - 1  tb sp
7. Baking Powder              -1 tsp

Procedure:


 1. Preheat the oven to 350 degree Fahrenheit before you  start the process.

2. Use  eggs in room temperature for  more volume in the batter.I used a hand  blender here  but you can  use an egg beater  and beat with your hand,,it takes  a long time  and  you really need muscle power :) .Now to my relief I have a  hand  blender  which is handy to use  and  doesn't take a  lot of  space.My mom uses  the manual egg beater until now.I'm  planning to  gift her one  on my  next visit :)

3. Mix all purpose flour and  baking powder and  sieve  this mixture couple of times.(You  can use  pre-  sieved flour)

4. In a  big  bowl blend  granulated sugar and  4 eggs very well,The texture should  be something like  shown in the picture and pale yellow in colour.

5. Pour 3/4 cup of  Vegetable oil to the mixture and  beat  for 1 minute with the electric  blender.

6. Then  add the flour and baking  powder mixture slowly and  mix with a  spatula until the flour is   completely incorporated.If you  feel  at this  point  the  mixture is thicker than required then  add  some  milk and  bring it  to  the consistency where you  can smoothly pour the batter in the  baking mold.

7.Add 1 tbsp honey and  vanilla extract and  mix well.Mom says while  mixing do it in one direction don't change  directions (May be that lets the air bubble to escape and the cake  wont be as  soft and  fluffy)

8.Spray the  mold with  some cooking oil or  you can  spread some  oil with your  hand and  dust some  all  purpose flour to completely coat the  surface.

9. Pour  the  cake  batter on the  mold(I  used a bunt  cake  mold ,but  any  cake  mold  would  do) and  slide in to the  pre-heated oven.Bake  for  about 30 minutes in  350 degree Fahrenheit.


10. Now its  time to   test if  the  cake  is  done , Pierce  a  knife or a skewer. If it comes out clean then   remove from the oven immediately and let it cool for  15 minutes.Once  cool down  it is  easy to take the  cake out of the mold  after some time.

11.When  I flip the cake in to a plate,,,,it  just looks a nicely baked golden cake ring.the cake  stays  fresh  outside for  about a week.You can  refrigerate. It becomes  a little hard inside the refrigerator,but you  can  microwave for  5-10 secs and  have a bite anytime,it  stores up to a month.


Tips: You can add  dry fruits or cocoa powder for  variation.But this time I wanted to bake the original recipe that  I  have been eating for  years.I will post  some variation  later point of  time.For now  happy reading  and  thanks  for visiting my blog.

Sunday, September 5, 2010

* Red Bean Flower Buns

                     
            I had these  red bean buns in  one  of the Chinese bakery.Chinese  bakeries always  have  many  variety of  buns,breads,cookies.Buns are  widely  two types steamed and  baked with as many types of fillings you can think of,,,beef pork,chicken,veggies,beans.As  I love baking so  I thought of making the baked variety.it came out  good and is a nice  breakfast,snacks  option if you make it  ahead of time,But nothing can  beat   any fresh baked good for  sure.The filling stays  good in refrigerator  for a long time  so you can  make  ahead  and whenever you have time can  make  different stuffs,,After I made  these  buns I was left with  some red bean paste  and  I had tried  stuffed parathas(Indian  stuffed  flat  bread) and they  also  came out well,,,tasted kind of puran poli.So you have  endless options with the paste.

Here I'll  divide the making process into two parts: 
  • Red bean paste making 
  • Bun  making

This recipe makes 10 buns.

Red Bean Paste :

Ingredients  for  Red Bean paste:

1. Kidney beans - 1 cup (soaked  overnight)
2. Sugar - As per your taste(I used approx  1/2 cup)

Procedure  for Red Bean  paste:


1. Once the kidney  beans  are  nicely  soaked in water over night you  put in on a  blender  and make a        
    thick  fine  paste as  shown in picture.
2. Heat  a  pan  and  pour the bean paste ,Keep stirring,I used a non-stick pan  so was  easy.Once the  bean
    paste  thickens, add  sugar and  adjust to your taste.You will know Bean paste is ready, when you can 
    draw a line in the  pan.
3. Let the bean  paste  cool down a  little bit until you  can form  balls  from the  paste.Apply some  oil in 
   your  palms and  make small  balls. Keep them aside.
                                You  can put the paste in a  zip lock  and  keep in refrigerator  for  about  1-2  weeks and   can use  in any  other recipes as well.


Bun making :

 The  Bun is  made  from the regular  yeast  dough.
 
Ingredients for  the Bun :

1. All purpose flour : 1  cup
2. Milk Powder      : 1/8 cup (Optional )
3. Yeast                  : 1 tsp
4. warm water         : 1/2 cup (you can substitute milk)
5. Sugar                  : 1/2 tsp  (for  yeast to be active)
6. Salt                     : 1 pinch  (for  yeast to be active)
7. Egg                     : 1 (for  egg wash--Can be replaced  by milk if you want a  complete  vegan  version)
8. Sesame seed     : 1  tb sp(Optional for  decoration)

Procedure for  buns:

The  entire process  takes  around 1hr 30 mins  to 2 hrs.Plan  so as to fit in your  other chores in between so that you don't feel its  a  time consuming stuff.

1. In bowl of warm milk/ water mix in the yeast,sugar and salt and  leave it for  about 10 minutes.You  should  see  frothy stuff,,if  at the end of  10 minutes its  not frothy then its no good.throw it and  start all over  again.The reason  why the yeast wont react is  may  be the  milk is too hot to  kill the  yeast .And sometimes the yeast is very old and not good to use any more then throw that and buy a new packet.
 
2.Make a  dough  using this yeast mixture to the flour.And keep it aside  for  1  hour in a  warm  place.

3. After  1 hour  the  dough  would  have  risen  to double the  original size. Punch the  dough and keep another 10 mins. 


4. Then make  small balls with it and keep it covered  with the  kitchen towel so that they won't dry out.

5. Take a  ball of the dough  and  put the red bean  paste  ball in  it and  wrap  to make  the bun and  keep in the baking sheet  with the seal side down.Repeat  this with all the  balls and let it sit for  10 more minutes.Now switch on your  Oven ,so that it reaches the baking temperature when  you slide in the buns.

6. Now the Flower  part comes.To give the shape of  a flower as the  name says, cut  the  sides  with a pair of   scissors as shown in the picture.

7. Beat the  egg and   brush the bun top with a pastry brush and  sprinkle  some sesame seeds on top.

8. Slide the tray into the preheated oven   and  bake in 350 Degrees for  about 30 minutes.You can see nice golden brown colour on top.

Now these beauties are ready to  munch one.


Thanks for visiting  and  happy cooking.

Saturday, August 28, 2010

* Garam Masala

Garam masala is  the  basis of many of the  Indian  curries and  gravies.Many think the store-bought verity is  the best.but  me tell ya,,there is  nothing compared to  freshly  ground garam masala...mmmmmmmm,the  smell is just heavenly.This fresh ground  garam masala when added to  any curry takes it to  another level of ecstasy.
I always  prepare this in small amount and my  obedient  kitchen Gadget coffee grinder is a big Savior for  me, which is now  an absolute  necessity in my  kitchen . All the measures are approx,so if you like some flavor more than the other,then you  can do  some  plus /minus accordingly.


Ingredients:

1. Star anise  - 1.5 stars
2. Cloves      -10-14 numbers
3. Cadamom - 10-12  numbers
4. Whole pepper - 15-20 numbers
5. Cumin             - 1/2 tsp
6. Cinnamon       - 2 inch stick
7. Mace             - 1 tsp(optional,but gives a nice  flavour)

Procedure :

Grind  everything in a coffee grinder for  about a minute and use as soon as possible.If you have some left overs then keep it in airtight container, but try to finish it soon, the  nice aroma doesn't last  longer.


Happy reading  & thanks  for  visiting.

Tips:
You can  dry roast the  whole  spices for   enhanced  flavour.

Saturday, August 14, 2010

* Chicken Butter Masala.........

                  Chicken Butter Masala is  probably the most famous Indian  dish abroad. I  have  been asked  by many of  my co-workers  or friends who have at least once tasted Indian food in restaurants for this recipe,,I  can understand why,Because every Indian  Restaurant you  go in Toronto,,the  silky textured yellowish-red  gravy with boneless chicken tikka pieces is  the most ordered dish. Originally the  chicken tikkas  are done on clay oven which imparts a  great aroma.The oven is a great alternative but that smokey flavor goes missing. It’ also  has got this wonderfully distinct it the rich sauce. The incredible orange color appeals to the eyes and the thick creamy texture is just waiting for warm pieces of naan to be dunked and scooped up.

Here  goes the recipe ...........

This dish  has two  steps :
1. Preparation of the  chicken tikka
2. Preparation of  the gravy.

Preparation the Chicken  Tikka :

These tikkas can be  enjoyed  as  an  appetizer.You can grill or bake or barbecue them.This time  I pan grilled them ,but  any  process is  good enough for the tikkas.

Ingredients for Chicken Tikka:

1. Boneless chicken : 1 lb  (cut in small cubes)
2. Ginger &  garlic  paste  : 1 tb sp
3. Salt : to taste(Always taste the  salt in your marinade  before you add the chicken) 
4. Garam Masala : 1/2  tsp
5. Coriander Powder : 1 tb sp
6. Cumin Powder : 1 tsp
7. Oil : 2 tsp
8. Turmeric : 1/2 tsp
9 .Yugurt : 2 tb sp
10.Lime juice 2 tb sp


Procedure  for Chicken Tikka :
1. Mix all the  marinade except chicken  and  adjust your  salt level.Add chicken  cubes  and  keep it  for at least  1  hour.You can keep it for a  day,if you have time or you plan ahead.Overnight maritation gives the best  result.
2. In a  pan add a  tsp  oil and  pan fry  the  chicken  cubes for  10 -15 minutes or  until done.(Don't  wash the  pan  if you are going to make  butter chicken ,Use  the  same  pan,the flavor  will  be really nice)

                Chicken tikka  is ready.if you are  having as  an  appetizer  then  squeeze some  lemon  juice  on top  and it  tastes awesome.I  always  munch on few  tikkas in the process of  cooking.just can't resist :)

Preparation of  the gravy:


Ingredients for  chicken  Butter masala  gravy :


1. Onion :  1  cup (Chopped)

2. Tomato : 1 cup (chopped, Use the  bright red color  tomato)
3. Dried Fenugreek Leaves (Kasuri Methi) : 1 tb sp
4. Sugar  : 1 tsp
5. Tomato  ketchup - 1-2  tb sp
6. Corriander  powder : 1 tsp
7. Cumin Powder : 1/2  tsp
8. Garam  masala : 1/2  tsp
9. Red chilly Powder : 1/4 - 1/2  tsp or green chillies : 2
10.Cashew : 10 numbers
11. Butter  : 2 tb sp
12. Cream : Optional
13. Red Food Colour : Optional optional,if you  want that resturant like  look then go ahead and  add(I did
     not add colour)


Procedure for  chicken  Butter masala  gravy :

1. In the same  pan heat oil,add chopped onion.When  onions are  transparent add  ginger garlic paste .When  you get  the nice  smell  of  ginger garlic paste, then add the chopped tomato.
2. Saute the tomatos  for  1  minute and  add  coriander powder,cumin powder,garam masala, red chilly 
    powder and cashews. Cook these spices for   3-4 minutes or  until cooked.(yo can add 1-2 tbsp water if 
    you feel it is dry)you will  know  it is cooked by  the texture and  smell.Add some  crushed  Fenugreek   
    leaves and  mix well..It  looks very mushy and  the raw smell of the spices will go away.
3. Cool down this mixture for  some time and  blend  it in a blender to  a fine puree.
4. Don't  wash the  pan yet......we want the full flavor in our  butter chicken.So in the same  pan add 1  
    tsp of  butter and pour in the puree you  just prepared. Bring it to boil.
5. Now time to add the chicken tikkas  to the  boiling gravy.The gravy is  already cooked,so no need to 
    cook for  a very long time now.Just cook for  5-7 minutes.You can see the silky texture of the   
    gravy.Add  the  tomato ketchup and  adjust your  seasoning now.Now is the time to add your  optional 
    ingredients: The red food colour and  and  cream.(I didn't add any).
6. While serving  top it with the rest 1 tb sp  of  butter.


       Serve  with  hot naans or  roti(Indian flat bread) and  you will  be licking your fingers.Enjoy  and  happy cooking.

Saturday, July 24, 2010

* Date & Walnut Eggless Cake

                    Since long I have been thinking of making a vegetarian cake,reason being my parent in-laws who are pure  vegetarian. I love to bake,but it is disheartening when  they  can't have  all the goodies that I love to make, so I have  been thinking on it since long. The  other day  I went to grocery  store alone(usually  me and  shaan  go together) and as usual my temptation to buy the whole store tickled me.I love grocery shopping as much as I love shoes shopping :) I bought a  whole bunch of dry fruits 4 founds of each. There was a big packet of  walnuts, for  which  he was after  me-'why you bought  such a big packet,it may get spoiled if you don't finish soon'. Before I opened the  walnut packet I bought another  date packet.
As soon as I reach  home in evening after work I start to munch on something... be it dry fruits or fresh fruits(whatever comes in front  of my eyes).The  other day I ate some dates and walnuts together and  liked it and then googled for  recipes.. I came across  many and tried to tweak  a  few and the  end result was just to die  for . I  was really skeptical about the cake(I was thinking how  will the  cake rise  and  get the  fluffy texture without  eggs), until I  flipped the  cake to the serving plate and oh,,it was  so moist and fluffy too. It was FIFA  finals day and  our friends  were  coming over for the game and  my new  experiment of vegan  cake was quality tested and recommended. Now I can't wait to go to  India  and make this  cake  for my  in-laws, hence this post is dedicated to my loving parent -in -laws.


Here  goes the recipe:

Ingredients:

1. All Purpose Flour : 2.5 cups
2. Pitted dates : 20-25 numbers
3. Sweetened Condensed Milk : 300 ml
4. Melted butter : 1/3 cup -1/4  cup
5. Honey : 1 tb sp (optional)
6.Baking powder :  1 1/4 tsp\
7. Baking Soda :  1/2  tsp
8. Milk : 1 cup + if  required  to thin the  cake  batter

Procedure:

1. Pre-heat  the oven to 350 degree F.
2. Soak  the date in hot milk for  20 mins and to make a puree blend it in a  blender adding  as little as milk needed.Keep thee rest of the milk for  later use.

                                                                                               (Click on the  picture to enlarge)
3. Sieve the  Flour,baking powder,baking soda  and  keep it aside.
4. In a deep bowl pour sweetened  condensed milk and  melted butter  and beat with a  hand blender(or
   manual beater) for  about 7-8 minutes.The texture should be as  shown in pictures.

                                                                                                                  (Click on the picture to enlarge)

5. While adding rest of the ingredients don't beat it vigourously just mix well with a spatula.
6. Add the date puree ,give it a mix.
7. Add flour,baking powder,baking soda mixture to the  batter  slowly incorporating  the flour into  the 
   batter. If you feel the batter is too hard then add some milk.The consistency should be as shown in the  picture.
8. Now coat the chopped walnuts in some  flour and  fold into the batter.
9. Pour the batter in to a greased and floured  baking dish and  slide into the oven for  40 minutes at 350
    degree F.As each oven works differently , test it by inserting a  knife time to time, take the cake  out  as
    soon   as  knife  comes out clean.
10. Cool the cake  for  about 15 minutes  before you serve. It tastes best warm and  it can be stored  in
    refrigerator  for  about 2 weeks and can  be microwaved for 15 seconds and  can be  enjoyed at a later
     time.

          Thanks for  stopping by  and  enjoy this moist   vegetarian  cake  and I  would be more than  happy to hear from you.

                                                                                                               (Click on the picture to enlarge)

Friday, June 25, 2010

* Turkey Lasagna(my Italian quest)


          Turkey Lasagna is one of the dishes I love to make and eat. As I love to eat different verity of food, get  bored of monotonous food very  quickly.If I'm asked the best thing of being in Toronto,,then I would say  the FOOD.The  choice of food that I got  here is  just  countless.You see the  entire zona of food horizon....say Italian ,Mexican, Thai, Indian, Japanese,Caribbean,,,,I can just  go on  and on.I have  one rule  eat everything you like  and have  a  regular  work out schedule.It is very important to stay  healthy,so I make  sure I  get  all the nutrients in my food and  never constrain myself of eating  something.One of the things I love to eat  is  cheese.,,Now you know why I love this lasagna,,,,yes,,,it  has  lotsa cheese.

 Here goes the recipe:
I  have  used  a 9X9 baking dish,which is  good enough for  4-5 people.

Ingredients:

                                                                                                                       (Click on the picture to enlarge)
1. Lasagna noodle(It  is   flat verity  of  noodle specially used  for  lasagna,so is the name  I guess) - 6
2. mozzarella cheese - 1  cup
3. ricotta cheese - 1  cup
4. Egg -1
5. Chopped  Celery - 4 tb sp
6. Chopped garlic -2  tb sp
7. Chopped Red bell pepper - 1 tb sp
8. Dried Oregano -  1 tsp
9. Dried  parsley - 1  tbsp
10. Mince Turkey -  1lb
11. Pasta sauce-  2 cups
12.  Grated part skim  Mozzarella  - 1 cup
13. Grated cheddar cheese - 1/2 cup
14. Grated Parmesan cheese - 1 tb sp
15. Olive Oil - 2 tb sp

Preparation :

First   prepare the meat  sauce and  then assemble  all the  ingredients   to  slip into the  preheated oven.

Meat Sauce preparation:


1. Pour  1 tb sp Olive oil on a hot skillet and keep  all the veggies ready.Toss in garlic,celery and red bell pepper(You can add veggies of your  choice here like carrot,different coloured bell peppers,,but everything should  be finely chopped,so that you don't  any big  bites of veggies while  eating lasagna).
2. After a minute add the  minced turkey  breast(I like to use  leaner  meat  and turkey breast is lean,You  can  do  variation with any meat you prefer). Add  salt to your  taste.
3. Cook for  about 10-15 minutes or until the  meat is done.Add the Classico pasta sauce to the meat. Here  any sauce will do but I like Classico`s sauces as they  are very flavourful. I have  used here Tomato & Pesto flavoured one.
4.Add dried  Oregano , parsley and mix well.Taste the sauce, isn't it yummy.Keep it aside.

Now we will cook lasagna pasta and then assemble the Lasagna:

The second step is  cook the lasagna pasta:

1. Boil  enough water for 4 pieces of  lasagna  noodles.Add some salt to the boiling water.Lasagna noodles are long but once you put them in  water they  will soften,,,so you really don't need a  big big vessel to cook them. Cook for about 7 minutes.Drain them  and brush little oil and keep  aside.

The third step is to  make the ricotta mixture:

1. Mix ricotta cheese, 1egg,1 tb sp Oregano and 1 tbsp Parsley ,Keep it aside.The herbs you use can be  fresh or dry.I have used dry here,just because I had  them handy in my pantry.

Now  the last step, assemble the lasagna:


1.Preheat the oven at 350 degree Fahrenheit for  about 15 minutes before you  pop in the assembled Lasagna
2. Now  you  are ready with  all the  ingredients,
First layer: Spread the  meat sauce evenly on the bottom of your baking dish.
Second layer: A layer  of  lasagna noodles.Layer the noodles evenly  in a single  layer,you  can cut them short  to fit your  baking dish.
Third  layer: The ricotta mixture.Try to spread  each layer  evenly and  the ricotta  layers  adds  a lot of flavour to the lasagna.
Fourth Layer: Another single layer of Lasagna noodles
Fifth Layer : Meat sauce
Sixth Layer: Ricotta mixture
Top  Layer: Spread  the grated Mozzarella cheese evenly on top.Here I added some  cheddar cheese.But the cheddar cheese  is  absolutely  optional.
3. Cover the  baking dish with  an  aluminium foil
4. Bake  for  30 minutes covered at  350  degree Fahrenheit .
5. Now uncover the aluminium foil and  sprinkle  some  Parmesan on top and  bake uncovered  for  10  more minutes.

Now the Turkey Lasagna is ready and  let it sit for  10 minutes  and   cut through to plate it